
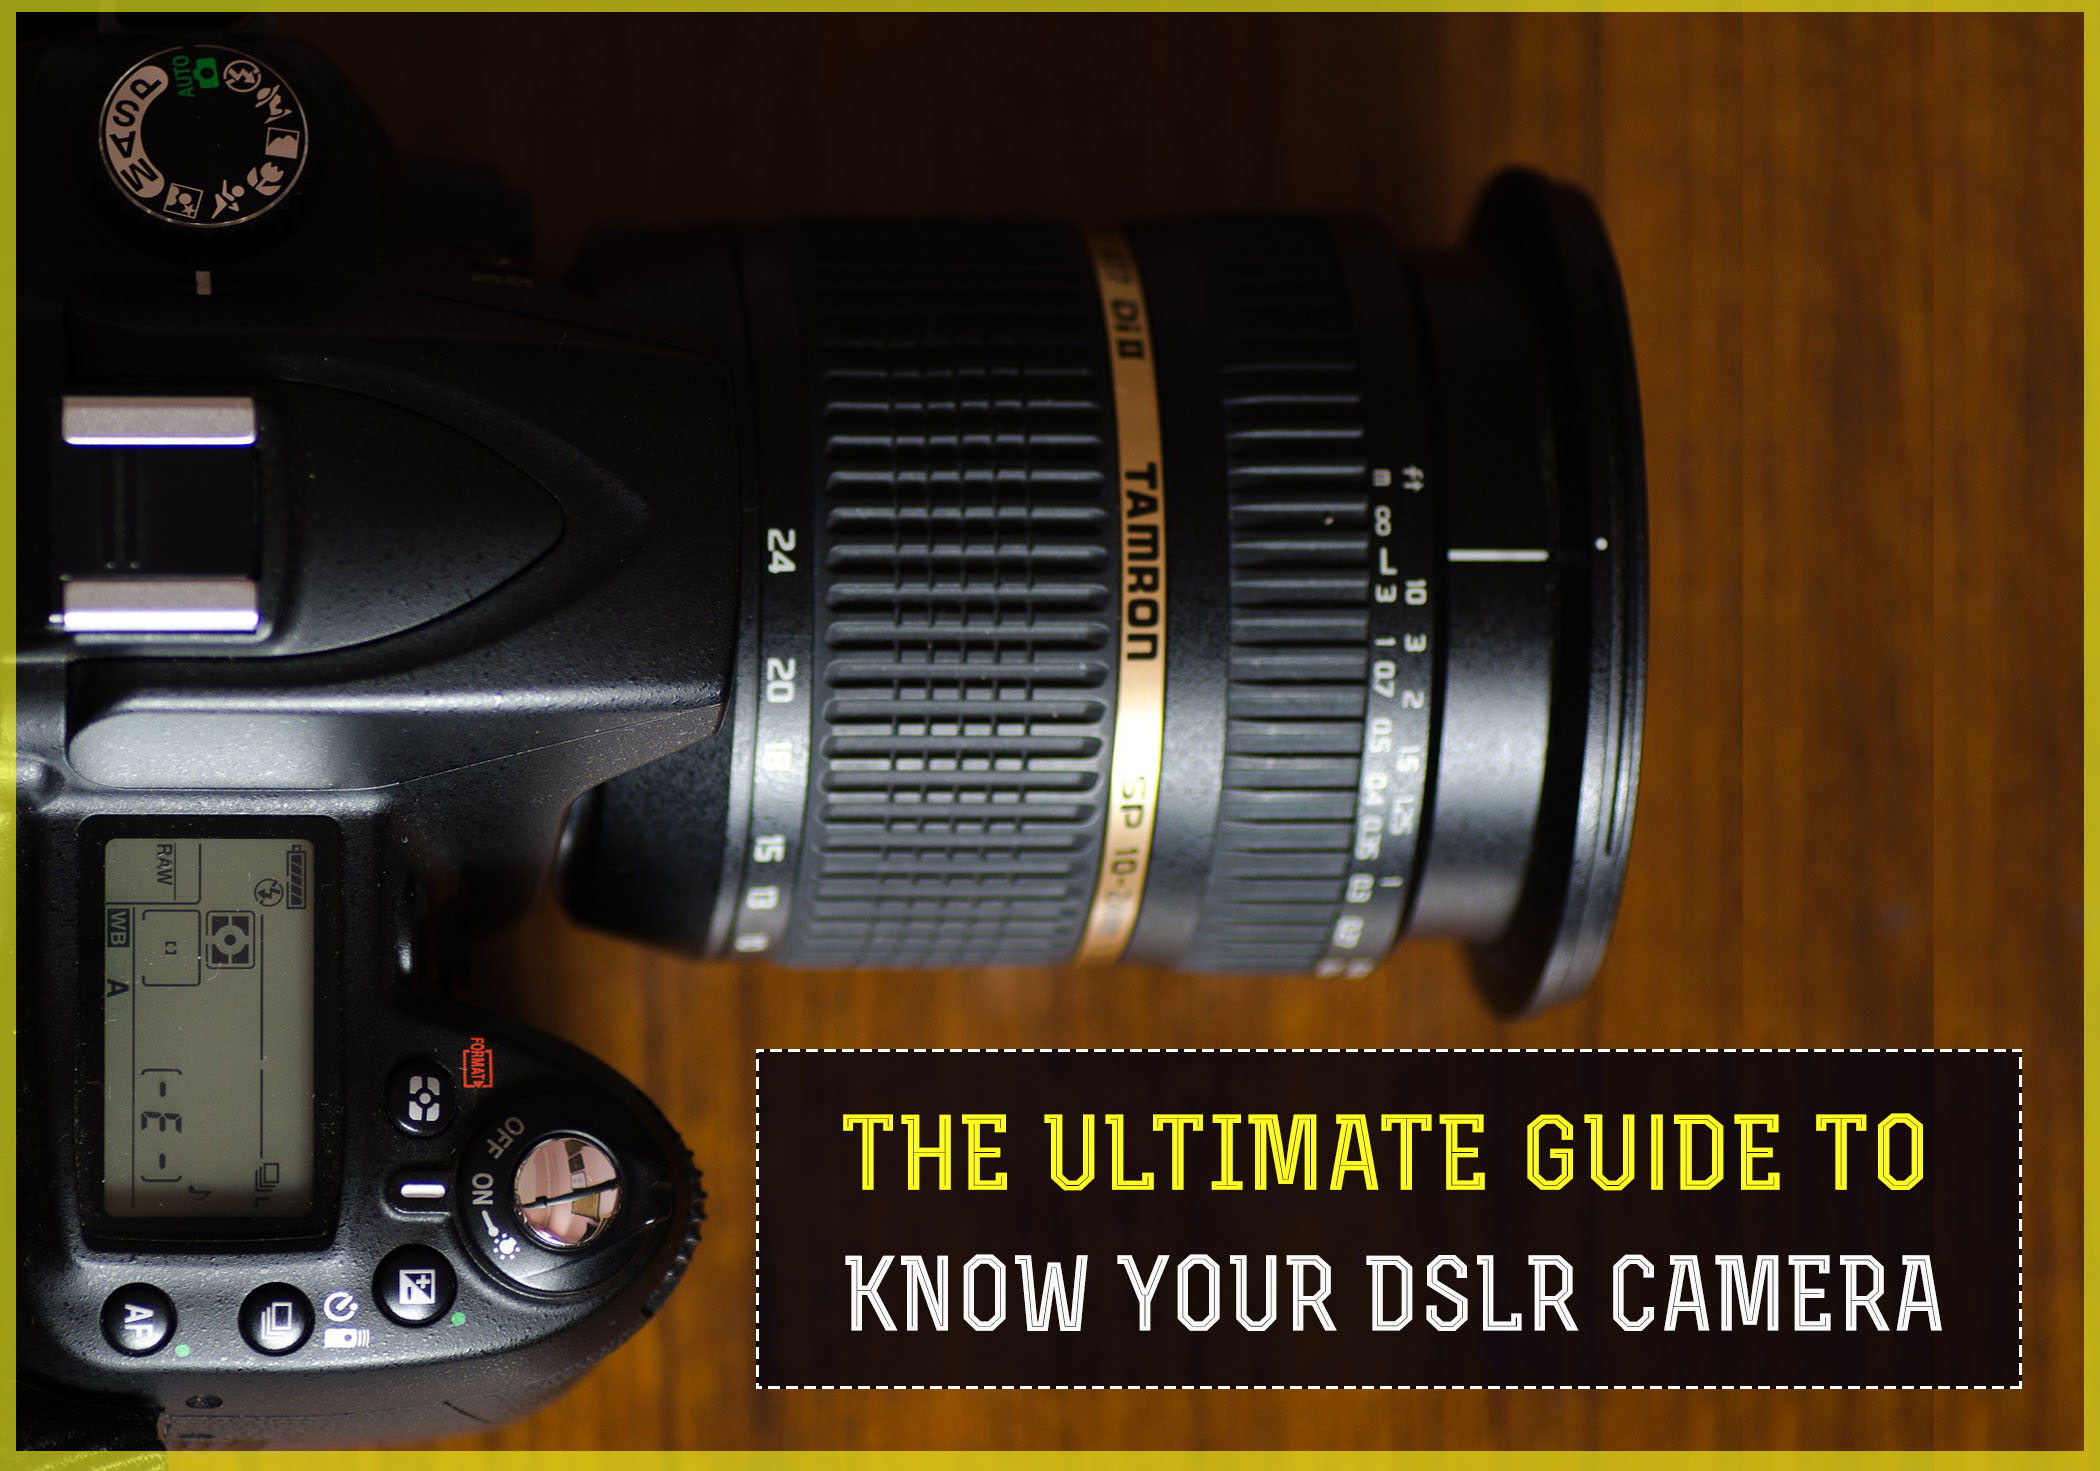
Your DSLR camera is a bundle of modern optical and mechanical technology. It has advanced auto-focusing technology, light sensors, low light performance and metering to name a few of them. Advances in optical technology has improved image quality and increased the ability of relatively new photographers to make stunning imagery. Photography has become a lot easier than it used to be say two decades ago. Much of it can be attributed to digital technology in photography.
Yet despite all its relative ease of use beginner photographers often find it extremely difficult to make properly exposed photos. The reason is they are unfamiliar with the technology behind the camera. The plethora of buttons and dials and menu options can be honestly, too intimidating. This article aims to address those issues and also introduce you to the wonderful world of digital photography. Happy shooting!
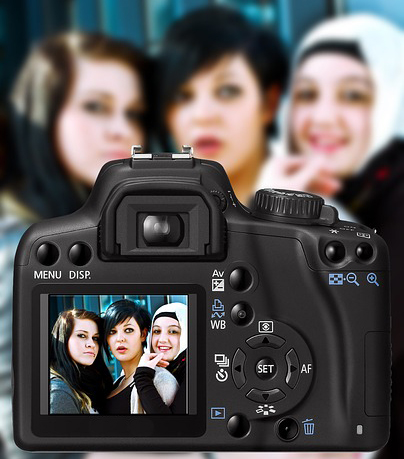
The parts of a digital camera
The digital camera is composed of a thousand different parts. Each one performs its own specific task which is vital to the final scheme of things – that is, making an image. While we are not too bothered about what goes on inside, knowing how the camera actually makes an image can be an invaluable thing in the larger scheme of things. But let’s just first start with the outside.
The digital sensor and the image processor
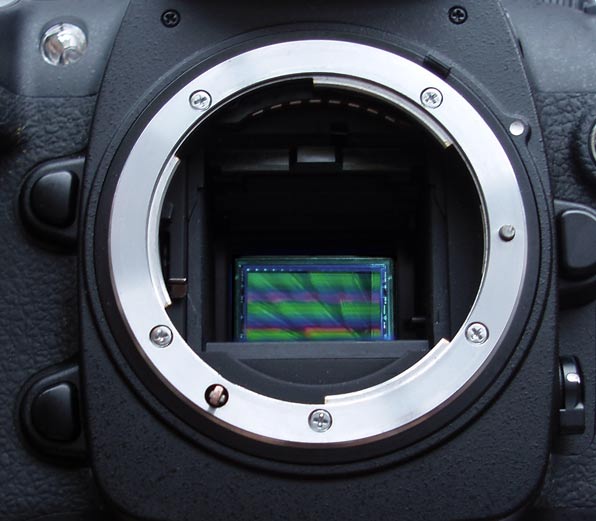
The heart of the digital single lens reflex camera (DSLR) is the image sensor. The image sensor sits behind the lens and receives almost all of the light that enters the camera. This light sensitizes the photo diodes that sits on the surface of the sensor. Light captured by the sensor is then converted into digital signal and passed on to the image processor inside the camera where it is converted into a digital image and recorded on to the memory card. This whole process takes place instantaneously. After the digital sensor, thus, the most important part of a digital camera is the image processor. The speed and performance of the image processor together with the efficiency of the digital sensor, directly results in faster image recording, quicker processing, extended buffer and continuous shooting performance.
The reflex mirror
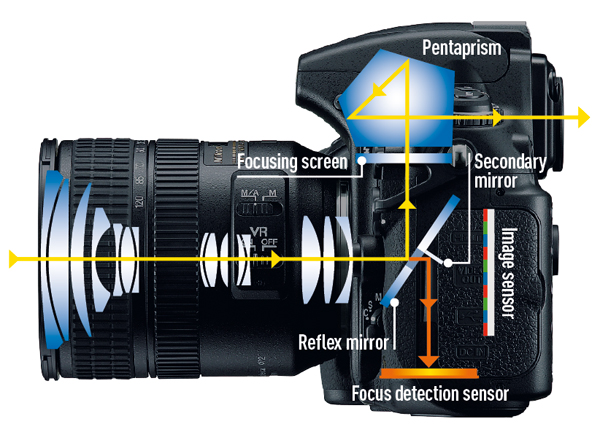
There are a number of moving parts inside a camera, and the lens if we consider that as a part of the camera too. One of them is the reflex mirror. The reflex mirror is of critical importance because it allows light to be bounced off of it and then projected through the viewfinder. Before that, however, light is transposes 180 ˚ by passing through a pentaprism (pentamirror inside cheaper entry level cameras). The mirror flips in an upward direction when you press the shutter button, right before light hits the sensor and an image is recorded
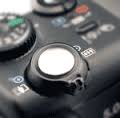
The mode dial
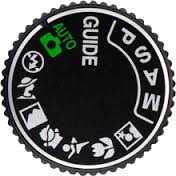
The mode dial (sometimes referred to as the shooting mode dial) is the main adjustment that controls how you are going to shoot. Let’s say that you want to control how much of the scene you want to be in focus. But you want the camera to decide on the corresponding shutter speed. You should set the mode dial to aperture priority. This mode allows you to change the aperture as per your preference. As you turn the command dial to select the right aperture for the shot the camera automatically selects the appropriate shutter speed. The shutter priority mode allows you to change the shutter speed. This is handy when you want to use a very long shutter speed for creative photography but want the camera to take care of the aperture. Simply switch the camera mode dial to S or Tv and then turn the main command dial to adjust the shutter speed. The camera automatically adjusts and selects the right aperture to make a proper exposure.
Sometimes though neither aperture priority nor shutter priority is enough. For the ultimate creative freedom you need to be able to control both the aperture and the shutter speed. This is only possible when you switch to manual shooting mode. The manual mode designated by the letter M on all systems, allow you to shoot with full control over both aperture and shutter speed. Let’s say that you want to capture a sweeping vista with much of it in sharp focus with a slow shutter speed so that you can capture the movement of the clouds as a blur. This can be achieved provided you switch to manual mode.
Getting the right exposure
In photography getting the right exposure is often referred to as the ultimate achievement. The thing is there is no such thing as a ‘right exposure’. Yet somehow the right exposure is often synonymous with the picture being good to look at. But something that looks goof to you may not look that good to another individual. Looking good or looking right is a subjective thing, much like the right exposure. No two photographer would have the same point of view when it comes to the right exposure.
Yet as a beginner you need a basic understanding of how to at least, make an image that looks good to the naked eye. To understand further on what is the right exposure, we first need to understand what exposure is. Exposure is the sum total of light that enters the camera and falls on the digital sensor / film, as the case may be. This light is then transferred into electronic signals and an image is recorded. You can control exposure, or the amount of light by adjusting two basic controls on your camera – shutter speed and aperture.
There are many ways to ensure that you have the right exposure. One of them is to select the right metering mode and then keeping an eye on the built-in light meter in the camera. So, which metering mode should you select and in which conditions? For landscapes select matrix or evaluative metering mode. For portraits select center-weighted
metering mode. For backlit subjects use the partial metering mode. Finally for really tiny subjects when you need metering to be dead-on accurate use the spot metering mode. The second element of achieving the right exposure is to ensure that you’re paying attention to the light meter on your camera. The light meter lights up when you point your camera towards a subject. There are indicators which goes from +3 to -3 with 0 being an averagely exposed scene.
In other words when the meter indicates 0 it means that the camera feels that the scene is correctly exposed for. Which is not always a true indication of the right exposure though. This is something that we will cover in the more advanced segment of this guide.
Generally for slightly washed out scenes under exposing is a better way to expose. For scenes where the subject is back-lit you will need to pay attention to the ambient light at the background as well as the light on the subject’s face. If you expose for the background the subject’s face will be underexposed and if you expose for the subject’s face the background will over-exposed. To avoid this the trick is to use the flash in fill-flash mode. First meter for the background and then add the flash to compensate for he underexposed face.
Focusing
Focusing is the act of getting maximum contrast among adjacent pixels. Because evidently when maximum contrast is obtained among adjacent pixels, the image sharpness is at its highest. A less technical explanation would be when you can see your subject as tack sharp you can tell that your image is in focus. But how does the camera do it?
When you half-depress the shutter button the camera passes some of the light entering the camera to a smaller mirror (below the reflex mirror behind the lens). This mirror redirects the light to a set of phase detection auto-focusing sensors. The phrase phase-detection refers to how much gap. What happens is that the light gets split into two beams and are redirected to two sets of phase detection sensors. Two sets of images are lined up and they are tallied together to adjust focus. The technique is similar to what was used in rangefinder cameras back in the old days.
The shutter button
The shutter button is what triggers the auto-focusing mechanism and the rest of the image making operations inside a camera. When you half press the shutter button, focus is locked. When you fully depress the shutter button the mirror inside the camera flips out, the shutter curtains open and light is allowed to enter the camera. The light falls on the sensor, the photo diodes are sensitized and a RAW image of 12 or 14 bit is produced. If the image processor works on it further, contrast and sharpness is added, white balance is adjusted and the final image produced is in a JPEG format.
Common settings
Common settings are a bunch of features that add additional dimension to your imagery.
Flash: The built-in flash that pops-up when you press the shutter button in auto mode is a powerful tool. If it is used in a judicious way it can add a lot to your images. Every flash has a guide number associated with it. The guide number denotes how powerful the flash. It is always expressed as a number, which is the product of distance of the light to the subject and the aperture. This is always measured at ISO 100. Let’s say that the guide number of a flash is 100. That means at ISO 100, when using an aperture of f/4 you can correctly expose a subject standing 25’ away. Or you can correctly expose a subject standing at 50’ with an aperture of f/2.
The Timer function: The timer function enables you to set the camera on auto to take a picture automatically after a preset time period has elapsed. This function is handy when taking group shots as well for taking well composed selfies.
Exposure compensation: is a forced manual option that works in auto, aperture priority and shutter priority modes. With exposure compensation you can force the camera to accept what you think is the right exposure values, overriding the exposure values that the camera gives you. Let’s say that in aperture priority mode when you select f/4 the camera gives you a shutter speed of 1/200. If you wish you can compensate and dial in your own shutter speed preference in small increments or decrements of 1/3 stop. This feature does not work in manual mode.
Shutter speed, aperture and ISO
Shutter speed and aperture are the three fundamental controllers of exposure. They individually do control some other elements of shooting as well. Such as aperture controlling depth of field and shutter speed controlling image blur, but overall they control the amount of light that enters a camera. ISO, the third parameter is more about hardware amplification of the light signal. It does not control the amount of light that enters the camera during exposure, but amplifies the signal afterwards. Let’s take a closer look at these elements and how they can impact your images.
Aperture is often compared to the pupil of the eye. It contracts and dilates and thus control the amount of light entering the eye. This is the same function that the aperture of a camera has to do. Like the human eye the size of the aperture can be controlled. This is done through a series of diaphragm blades. The size of the aperture is measured in f-stops. The more accurate explanation of f-stop would be a ratio between the focal length of the lens to the diameter of the lens opening. The frequently referred to f-stops are f/4, f/5.6, f/8 and so on. Aperture can be controlled using the mode dial and by selecting either Aperture Priority (Av / A) or Manual (M) on it.
Larger the f-stop smaller is the actual size of the aperture and vice versa. This is indeed a paradoxical thing to remember, it is like driving all your life in the US and then all of a sudden having to drive in the streets of UK; everything seems to be going in the wrong direction! Good thing is you will get used to it.
As the aperture size increases so does the amount of light. But with it something else happens and that is the depth of field, in other words the amount of the image that is acceptably sharp focus, tend to get shallower and shallower. Lenses with bigger aperture such as the Nikkor 50m f/1.8D are thus much sought after. With these lenses you can focus on a narrow area of the scene and have everything else blurred out.
Shutter speed
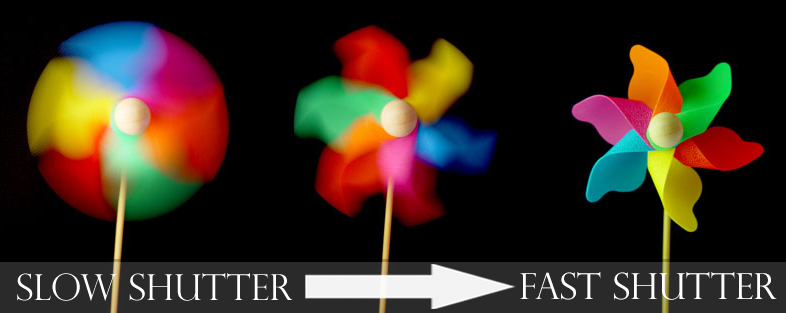
Shutter speed denotes the length of time for which the lens remain open to allow light to enter the camera. Faster the speed smaller is the time and vice-versa. At faster speed as you can imagine less light is captured. However, as the shutter speed is fast no image blurring occurs. On the other hand when the shutter speed is longer more light is captured. However, unless you are capturing still life, longer shutter speed evidently results in blurred images. Blurred imagery have its own requirements. We will come to that when we talk about advanced shutter speed techniques and compositions. However, for the moment, let’s just consider that images with blur are a no-no. Shutter speed can be controlled using the mode dial set to either Shutter Priority (S/ Tv) or Manual (M).
Depth of field
Depth of field as you have already read above is the amount of the scene that is acceptably sharp. Aperture is the primary controller which governs how much of the scene will be in focus. Another thing that controls it is the focusing distance. Smaller aperture generally tend to increasingly larger depth of field, but up to a point. After a point, and that depends on the lens construction and quality, reducing the aperture is counter-productive. Professional photographers use a technique which entails focusing at the hyper-focal distance. That produces the maximum depth of field.
ISO
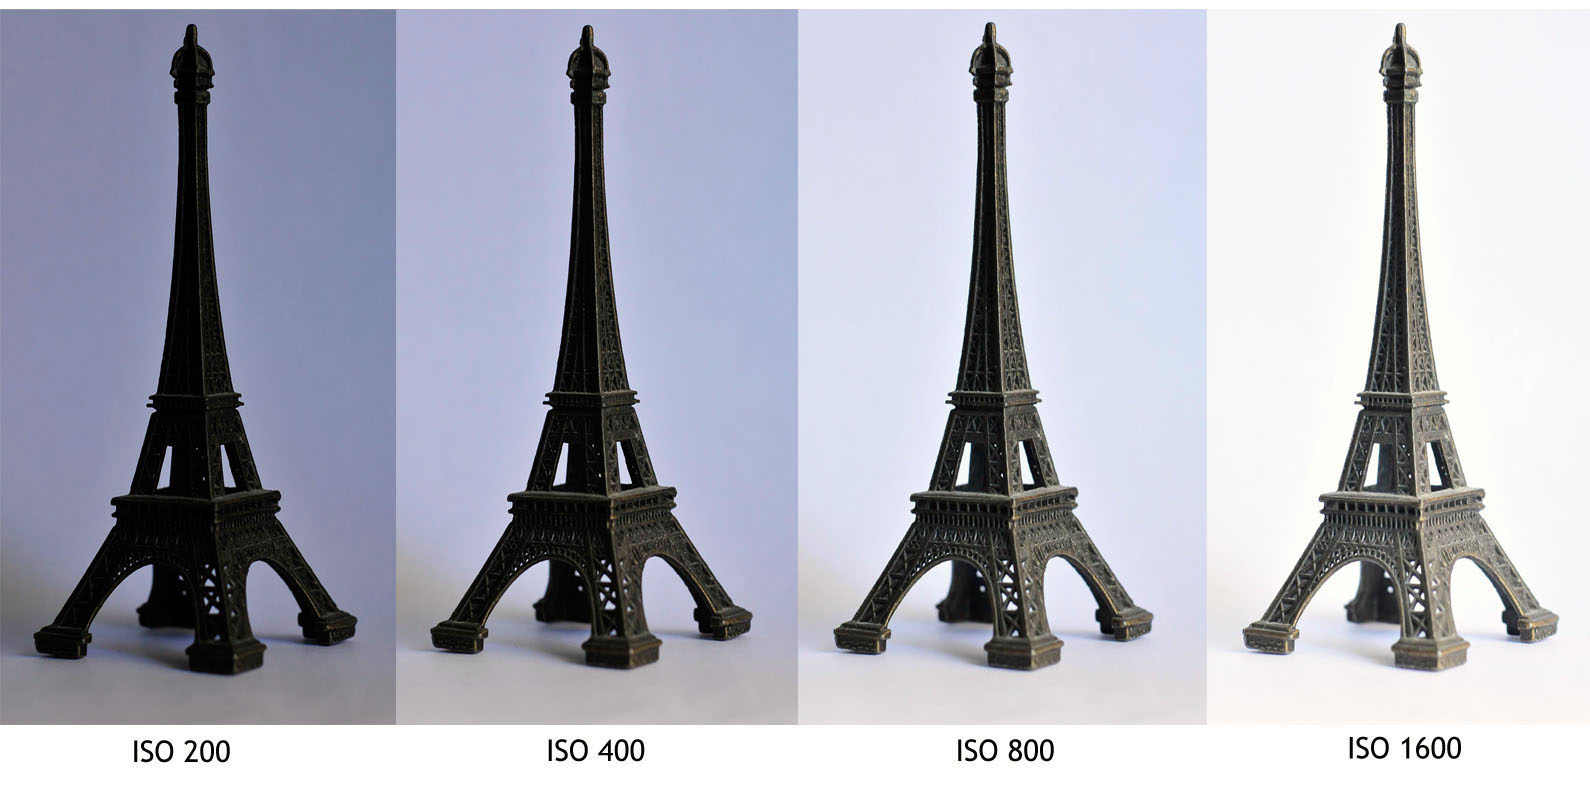
ISO is an acronym that stands for International Standards Organization. However, for the purpose of our discussion it relates only to the sensitivity of the sensor. When film was in its heyday we used films of varying speeds such as 100, 200 and so on. They were labelled as ASA100, ASA200 and so on. ISO is the same. It refers to the sensitivity of the sensor to light. With each increase in the ISO number you would basically be doubling the sensitivity of the sensor. That means with increasingly low light situation you don’t have to slow down the shutters peed nor increase the aperture nor use a flash to get a proper exposure.
Let’s say that you are shooting in ISO 100 at aperture f/5.6 a shutter speed 1/400. If the ambient light goes down by about one stop, you can either choose to slow the shutter speed to 1/200 or use a faster aperture of f/4. But if you increase the ISO to 200 you will have to do neither. Your composition, depth of field and the image remains the same.
Using scene modes

The scene modes allow you to quickly select a preset exposure value that has been programmed into the camera for a certain scene. Let’s say you are shooting on the beach and the light is strong. You don’t know what exposure values to use. You simply switch mode on the shooting mode dial and select Scene. From thereon you will be able to select Beach as the shooting mode and all the preset values will be called in for a proper exposure. There are a bunch of scene modes to choose from including Snow, Backlit, Candle and so on. For ultimate creative freedom, however, you need to master manual shooting.